
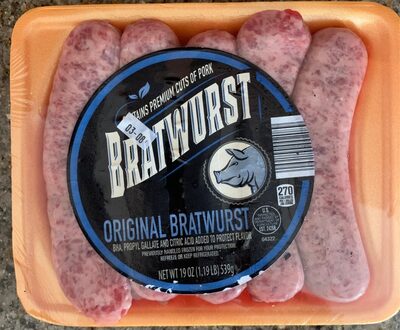
Want to whip up a quick batch of finger-licking brats but worried about how to cook them since they are frozen?
Here is a list of different methods that have been concisely put together to solve all your doubts on how to cook frozen brats.
Boiling Frozen Brats
As soon as you read the word ‘boiling,’ you smiled, right? This is easy peasy lemon squeezy. Well, you are absolutely right.
Water Boiling
All you need to do is take a saucepan and a glass or two of water in it. Let it boil for a few minutes. Once the water starts bubbling, put the frozen brats in it. Let them simmer for 10-15 minutes.
After the simmering is done, remove the boiled brats from the pan, and put them on a plate. Your boiled brats are ready.
Boiled brats are soft, retain the delicate meat texture, and are blush pink in the center, an indicator of perfectly boiled brats.
Beer Boiling
Though plain-old boiling seems the easiest, it is also the blandest. So your next question would be, how to add the oomph factor to these salt-less brats? Let’s see what we can do about that.
Beer’s a crowd favorite. Who doesn’t love at least downing one bottle every Friday night? What if I say that you can take your love for brats and beer to another level, excited?
The only change you need to make is to use beer instead of water in the saucepan. All other things remain the same.
Boiling brats in the beer absorb all its flavor and turn the dull brats into beer flavor brat bombs. The sharpness of beer, along with the meaty juiciness, will surely leave your palate asking for more.
As cliché as it sounds, it is truly a match made in heaven.
Grilling Frozen Brats
How to go about grilling frozen brats?
The first thing that you absolutely need to do is unthaw them. Unthawing is defreezing/removing them from the deep freezer/fridge and bringing them to your room temperature.
This is not to risk uneven cooking on the brats and should be done a minimum of 20 minutes before actually grilling since that is the least amount of time needed for the frozen brats to come down to room temperature.
If you are pressed for time, do not fret. I got your back.
You can simply do what the first method suggested, i.e., boiling. You can opt for either of the boiling options: water or beer. Boiling lowers the temperate of the frozen brats quickly and speeds up the unthawing process.
Though you do have a backup plan, it is not recommended to boil before grilling, especially water boiling. This is because the brats take up the water flavor when boiling, making the brats bland in taste.
However, beer boiling is still okay because even if the brats absorb the beer flavor, it adds to the yumminess and is a pro rather than a con, unlike water boiling.
Now that the frozen brats are entirely free of any ice, you can begin grilling them.
The best temperature range for cooking brats on a grill is 300-350℉. This equals the tolerance of heat to your palm for about 6-7 seconds. If this period matches the one you remember/noted, then the grill is now ready. In stove terms, it is medium-low heat.
Why is temperature essential to consider? Nobody likes overcooked, or worse, undercooked brats. And, this is just not something you can know by your ‘instinct’ or ‘gut feel’ (unless you have way more experience than a beginner). Cooking is an art, and it requires precision. So, unless you are the one mentioned in the brackets, you have to measure the temperature.
Before you actually begin grilling, please note the following.
Note: Do not put the brats directly onto the grill. This results in tearing of the delicate casing (if you are using cased brats) and sticking the brats on the grill (if you are using non-cased brats).
You may ask, ‘what if I want those charry grill marks?’ The answer to that question will be answered at the end of the cooking procedure explanation.
Place a skillet over the grill. Using oil for a bit of a greasy touch to your liking of brats is fine, but do not overdo it. In the same way, beer can also be used as a base. (Do not use beer again if you have beer boiled your brats).
Onto the main step. Arrange the brats in the skillet while keeping a distance between each of them. Do not let the brats touch each other. This will cause brats to stick, and believe me when I say it is not an appealing sight for your appetite.
Let the brats cook on one side for 5-7 minutes. A minute or two extra if the brats are longer and thicker, they require more time due to their size than average.
Using mitts and metal tongs (do not use plastic tongs; trust me, melted plastic is not crave-fulfilling), flip the brats to their uncooked sides. Let them cook for another 5-7 minutes. Again, give them an extra minute or two if they are larger.
The brats are now ready to be taken off the heat. Be extra careful when shifting them from the grill onto the wire rack. Why? Because this takes care of two things.
One, ‘accidentally’ poking your brats will pour all your hard work down the drain. Poking results in oozing out of the juicy fats and meatiness, crucial to the flavor profile. Therefore, avoid that.
Two, using a wire rack cools down the hot cooked brats quickly comparatively to placing them on a plate.
I have not forgotten your love for the grill marks. Before pulling the brats off the grill, you can put them directly on the grill for a minute or two; not more than that, to give them a lovely design.
Your fantasy of cooking frozen brats on a grill is fulfilled.
Cooking Frozen Brats In Oven
As mentioned earlier, it is a must to unfreeze the frozen brats to cook in oven, either by simply keeping them outside of the deep freezer/fridge at room temperature or boiling. If you plan on boiling, then go through the merits and demerits and its types in the grilling part again.
First and foremost, preheat the oven at 400℉.
To start with, take a baking tray or casserole dish, whichever your most comfortable with. Next, place a parchment paper/aluminum foil as the base layer. This is to avoid any stickiness of the brats to the base of the tray/dish. You can even spray a non-sticky liquid not to take any risks.
Same as in Grilling, arrange the brats equidistant to each other in one in one layer. However, you have the option of keeping multiple trays/dishes at one time. You do not have to go through the hassle of cooking batches after batches. In one go, all your brats will be ready.
Put the prepared brats in the preheated oven for 15 minutes. You can give it a few minutes more if they are thicker and longer.
A great advantage of cooking frozen brats in the oven is you can skip the ‘flipping’ part. The oven has a two-way heating system, both from above and below. This aids in equal cooking on both sides and does not require flipping to cook the other side.
At the end of the required time, using mitts, pull the tray(s)/dish(es) out. Carefully put them on a wire rack or heat-resistant mat. In a hurry, do not place them on the direct counter; it is damaging since they are hot.
Char-lovers, do not be disappointed, thinking you do not have the option of charring in the oven. There is, in fact, a process called ‘Broiling’(with an ‘r’) which gives your brats beautiful char marks, identical to grill marks.
All you have to do is shift the brats to the highest rack without the tray/dish. Why shift? Broiling requires a concentration of high heat on the rack to give the brats those brown-black marks. Hence the shift.
Give the brats 5-10 minutes. Unlike cooking brats in the oven, broiling in over needs flipping at half-time so that the other side also develops the marks. The flipping act compensates for the absence of a top-covering rack.
When the brats have got the grill marks to your satisfaction, you can remove the brats from the oven.
Oven-cooked ‘n’ broiled brats are ready to dig into.
Cooking Frozen Brats in Air Fryer
Not happy with grilling or in oven cooking? Want a healthier option? I still got your back.
If you keep a record of your daily calorie count and bite your nails in the process, which is the opposite of what you are trying to do, Air Fryer is the next best option and the first best option if you are a fitness-minded eater. The secret is no use of oil.
For this, you do not need to defreeze/unthaw as in Grilling/In Oven. So if you use an air fryer all the time and often forget things, this method is undoubtedly your best one.
Also, if you are aware of your forgetfulness and end up being angry at yourself when the realization hits, here’s a special tip for you.
When you buy raw brats, you need to do a little wrapping before putting them in the deep freeze. First, wrap the brats in parchment paper and then with plastic. Next, freeze them for an hour in the freeze. Then, unwrap and put them in a freezer bag (aka Ziploc). Now you can put them in the deep freeze and be worry-free.
To get to the actual air frying part. Preheat the air fryer to 350℉.
Place the frozen brats in one layer avoiding a pile-up. Let them fry for 13-15 minutes, more or less.
Time for a flip-up. Let the other side cook too. Evenness is key to tasty brats.
If both the sides are cooked, then your air fryer has done its job, and the air-fried brats are ready for your growling stomach.
A tip to remember. Before placing the brats in the air fryer, keep a few pieces of bread. This is to absorb any melted fat that oozes out of the brats. Why waste the delicious gold liquid, full of mind-blowing deliciousness?
You can have those bread pieces as breadsticks; a perfect pairing with the meaty brats indeed!
Cooking Frozen Brats in Microwave
This method brings you back to the first method since it involves the principle of boiling, albeit with a few changes here and there.
Place the brats in the microwave dish or the dish you usually use when cooking anything in a microwave. Fill the dish with water until the brats are entirely submerged.
The amount of water must be such that it does not entirely evaporate and leaves the brats completely dry at the end of the microwave sessions.
Cover the top of the dish with plastic wrap. Next, put the dish in the microwave and set it to the temperature suggested by your microwave instructions paper. If you do not have it (as you may have misplaced/lost it), simply set it to the highest temperature.
Set the timer to 2 minutes. On the bell ring, remove the dish carefully, using mitts, and uncover the plastic wrap using tongs. Flip the brats.
Again, set the timer to 2 minutes. Then, on the bell ring, remove the dish carefully, using mitts, and uncover the plastic wrap using tongs.
Microwaved brats are ready!
To Poke or Not to Poke?
The million-dollar question. The answer to which is entirely up to you. Let me elaborate.
There is one thing I left to include in all the above methods (except boiling, where it is not required) of cooking frozen brats. And that is the use of a ‘Meat Thermometer.’
This instrument is used to measure the internal temperature of the cooked brats to make sure that they are perfectly cooked and no part of them is still raw.
To use this, you will have to commit one grave sin, considered a big ‘NO’ by all brat cooking experts worldwide. You will have to ‘poke’ a brat to insert the thermometer in it and let it record the temperature.
Poking leads to leaking all the actual goodness of brats in fats and moisture. This action will leave the brats dry and rough and ultimately puts off your exciting mood of eating the brats.
The only bright side to this whole scenario is that only one brat needs to be sacrificed to know the condition of all the brats.
To Conclude
You reaching the end of this article is a sign from the brat gods that you have been saved from the misery of eating poorly cooked frozen brats.
Your frozen brats are calling for you. Go on now. Enjoy!